One of SpotCam's amazing cloud services is that you can make a film by exporting the video footage you like and share on YouTube or download to your hard drive, it's all FREE! (Please note that before creating a time-lapse video, make sure you have activated the cloud recording feature and have recorded files available for capture.)
Operating with the Mobile App
Time-lapse video capture operations can be performed using the mobile app, whether you are using an Android or iOS smartphone or tablet. The following is an example guide using a smartphone.
1. After entering the live camera page, click on the panel expansion button located in the upper right corner to open the video capture options.
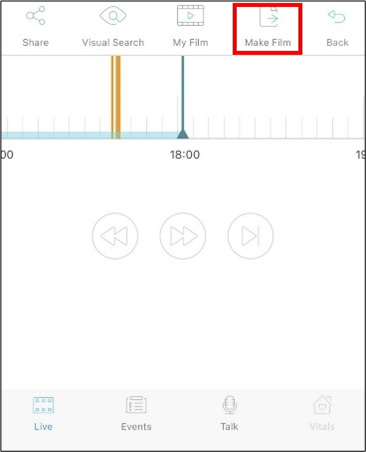
2. Choose the type of video you want to make. Here we choose time-lapse video. Check
here if you want to know how to make normal video.
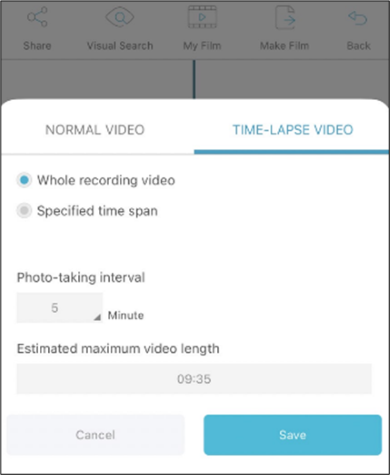
3. Next, you will see the options to make a time-lapse video from all recorded footage or from specified recording segments. Please select the time period you want to make a time-lapse video from and then set the interval for photo-taking of the time-lapse video. Note that the maximum interval for each video segment is 60 minutes. You will see an estimated video length after you complete the settings.
4. After completing the settings, press the "Save" button as shown in the picture. Your video will start processing and appear in your "My Film" page in a short while, as shown in the image below.
Please note: Image processing may take some time, and your video will appear in the "My Film" page once the processing is complete. The wait time depends on the length of the video you are creating and the number of users simultaneously performing this operation.
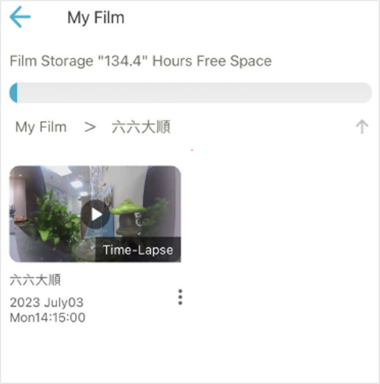
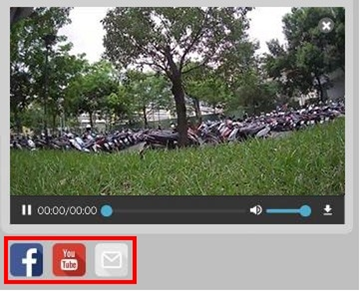
Once your video is produced and displayed in “My Film” page, you can click on the film placeholder to play the video. After starting playback, in the toolbar at the bottom of the popped-up video player, you will find options for downloading or sharing to social networks.
 Operating with a Browser
The aforementioned time-lapse video capture operations can also be conducted through a browser. The ability to utilize SpotCam's complete functionality via a browser is one of SpotCam's distinctive features. The following example illustrates how to use a browser to accomplish time-lapse video capture.
1. Go to the video viewing page of your camera in your browser and press the "Capture Video" button.

2. Choose the type of video you want to make. Here we choose time-lapse video. Check here if you want to know how to make normal video.
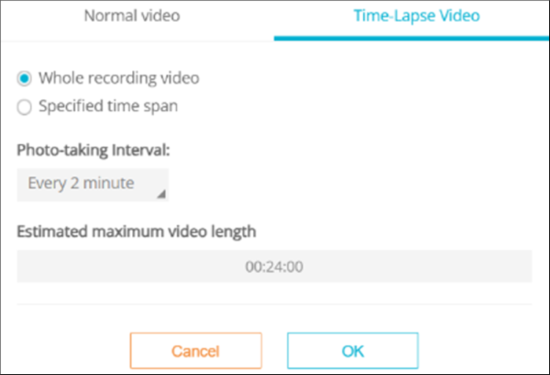
3. Next, you will see the options to make a time-lapse video from all recorded footage or from specified recording segments. Please select the time period you want to make a time-lapse video from and then set the interval for photo-taking of the time-lapse video. Note that the maximum interval for each video segment is 60 minutes. You will see an estimated video length after you complete the settings.
4. After completing the settings, press the "Save" button as shown in the picture. Your video will start processing and appear in your "My Film" page in a short while, as shown in the image below.
Please note: Image processing may take some time, and your video will appear in the "My Film" page once the processing is complete. The wait time depends on the length of the video you are creating and the number of users simultaneously performing this operation.

Once your video is produced and displayed in “My Film” page, you can click on the film placeholder to play the video. After starting playback, in the toolbar at the bottom of the popped-up video player, you will find options for downloading or sharing to social networks.






 English (UK)
 日本語
日本語 繁中 (台灣)
 繁中 (香港)
 Deutsch
 Français
 Suomi
Suomi