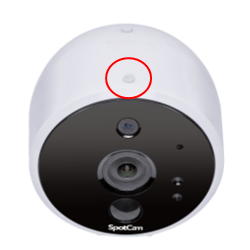
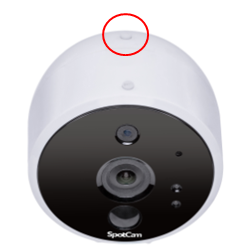
There are 2 buttons on SpotCam Solo, one is for user to switch the camera between AP/Client mode and the other one is for user to release the camera back cover and insert the microSD card or install the batteries.
Switch camera to AP mode:
All SpotCam are shipped in AP mode and during first time installation they will be switched to client mode for Wi-Fi connection. In some situation, you may need to change the WiFi connection for your SpotCam. Before you run the “Change WiFi” process via mobile app, you must switch your camera back to AP mode.
Please press the button with signal symbol on the top of the camera for 3 seconds and camera will switch to AP mode, and its status LED will start blinking in orange.
If you mistakenly pressed the button and switched camera to AP mode, please don’t worry about it. You can press the same button for 3 seconds and switch it back to client mode directly, your Wi-Fi setting won’t be erased in this case.
Reset camera locally:
If you want to install a used SpotCam Solo with another SpotCam account, you can restore the camera connection and login to SpotCam App using original account and then deactivate the camera in “My Account” page. Deactivate SpotCam while it is online will erase all registration record saved on both cloud server and camera’s memory. After the deactivation process is completed, you will be able to install the camera with other account.
In some other case, if you can’t restore the camera connection or you forgot the original account information, you still can reset your camera locally. Please follow below SOP to setup your SpotCam Solo again:
1. Press the button with signal symbol on the camera for 10 seconds, and both green and orange status LED will light up.
2. Camera will reboot automatically after local reset is completed. And camera will work in AP mode as default after reboot.
3. Please contact us and provide us your camera serial number (SN), and we will help you to erase previous camera registration record on database.
※ If you only reset the camera locally but didn’t provide the SN to SpotCam support team to erase previous registration record on server, then your camera won’t be able to connect to the cloud server.
4. After finished all above steps, you will be able to install the camera with other account.
Release camera back cover:
SpotCam Solo supports local microSD card recording and can be powered on by AA batteries. To insert the microSD card or install the batteries, please press the button with arrow symbol on the camera to release the back cover, and then you can insert the microSD card and install the batteries for your SpotCam Solo.


 English (UK)
 日本語
日本語 繁中 (台灣)
 繁中 (香港)
 Deutsch
 Français
 Suomi
Suomi